
Fake eyelashes have become a common thing for some women who prefer long lashes. However, it may be a bit intimidating if this is your first time doing it. This guide will break down how to put on fake eyelashes for beginners in a few simple steps.
If you still prefer to use the glue on option on putting on your fake eyelashes, choose the right product for your eyes is important. Rely only on certified aestheticians to get extensions, ask about the ingredients in the glue, and always ensure good hygiene is followed by yourself or the person providing the service. Hand washing is crucial, too, before any hands get close to your eyes.
* As an Amazon Associate I earn from qualifying purchases.
How to put False Eyelashes On?
If your natural eyelashes lack length and volume, give them a boost with a pair of false lashes. False eyelashes help you achieve a dramatic look that works for great events.
When properly applied, false eyelashes blend in well with your natural lashes, so it’s difficult to tell them apart. You can apply false lashes in just a few minutes, even if you’ve never worn them before. For beginners, you may follow the following steps if you want to do this at home.
First, hold one of the false eyelashes against your eye to check its length. If the false eyelash is longer than your real eyelash, cut off the outer edge with nail scissors so both are the same length, then bend the false eyelashes into a “C” shape, so they fit the curve of your eyes.
Secondly, apply a line of glue to the false eyelash strip. If you have trouble doing this, try applying the glue with a toothpick or cotton swab. Wait a few seconds for the glue to dry slightly before applying the lashes. Blow on the glue to speed up the drying process, if desired.
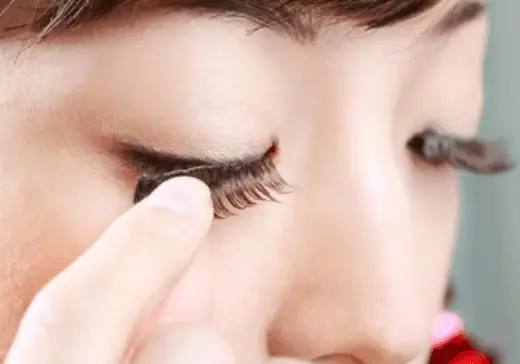
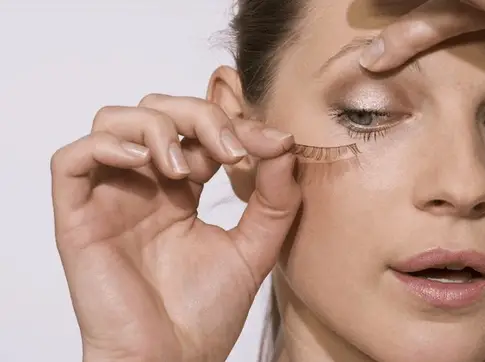
Third, press the false eyelash down over your natural eyelash line. The cut end of the eyelash should go over the outer corner of your eye. Squeeze the false eyelash and your natural eyelash together gently with your thumb and index finger. Repeat this process with the other eye.
To conclude, apply mascara to the false eyelashes, so they blend in with your natural eyelashes. Curl the eyelashes with a crimping tool, if desired.[Source]
How To Put On False Eyelashes For Beginners Without Tweezers?
- Apply mascara
Curl natural lashes and comb on a coat of mascara, creating a shelf to support the weight of your falsies.
- Cut to fit
Cut the lash band right down the center to create a large individual lash. It is easier to place than a full lash strip, becoming wonky and weird and asymmetrical.
- Add adhesive
Trace each lash band, one by one, with a laser-thin line of the duo and wait a few moments for the adhesive to dry a bit.
- Put the lashes on
Using your fingers, not tweezers, place your extension on the outer corner first, hugging that lash line tight. For an eye-lifting effect, Mikkelsen recommends placing the outer extension slightly above the natural lash line. When you’re placing the inner lash extension, avoid going close to the tear duct to give a little more width to the eye. If it’s too close, it makes your eyes feel like they’re narrower and even cross-eyed.
Anytime is a good time for falsies as far as we’re concerned. But we know getting glue near your eye can be intimidating. We called up benefit cosmetics makeup artist Deanna Tharp to find out exactly how to place faux ones like a seasoned pro. So gather your supplies and choose your own adventure. Want drama? An all-the-way-across strip lash is your answer.
Once you’ve chosen your lashes of choice, you will also need some glue black eyeliner, tweezers, a pair of scissors, and cotton swabs. For individuals, you’ll need a small cup to hold the glue. This is a great time to repurpose those dressing cups from the salad bar. Before you start, line your upper lash line with black eyeliner (this will hide the falsies’ base and then get to work!
Tips
- Most false eyelash kits come with a small tube of glue. If this glue doesn’t stick as well as you’d like, you can also buy higher quality glue that helps false eyelashes stay on longer.
- Use black eyeshadow or eyeliner to hide gaps between false eyelashes and your own lashes.
- To remove your false eyelashes, apply an oil-based makeup remover to a cotton swab. Dab the lash line with the makeup remover. Open your eyes and grasp the outer corner of the false eyelash. Close your eyes and carefully pull the eyelash away from your eye. Repeat the process with the other eye.
- Wash your false eyelashes no more than once a week. Too much washing will cause the fibers to break.
- HYDRATING OIL: Formulated with a unique blend of coconut and argan oil, Burt's Bees facial cleansing oil provides instant hydration leaving the surface soft & smooth
- FACIAL CLEANSER: From normal to dry skin, Burt's Bees facial cleansing oil gently dissolves dirt and makeup without stripping your skin’s naturally protective moisture barriers
- NATURAL FACE CARE: Formulated without parabens, phthalates, petrolatum or SLS, Burt's Bees 100% natural origin facial cleanser oil cleanses skin for a healthy-looking, smooth complexion
- DERMATOLOGIST TESTED: Burt's Bees natural origin facial cleansing oil is dermatologist and ophthalmologist tested to gently cleanse skin and is also safe for contact lens wearers
- #1 Dermatologist Recommended Natural Skincare Brand
* As an Amazon Associate I earn from qualifying purchases.
How to Put on Individual Eyelashes?
Individual lashes can add length and volume to your normal lashes while maintaining a natural look. While applying individual lashes may take some time, the result is worth it!
For Individual eyelashes
Step 1: Gently pull the lash off the packaging with your fingers—not the tweezers. Tharp explains that you might need a little force here, and a tweezer’s grip is strong so that it can bend the lashes. Once you’ve freed the cluster, stick it on the back of your hand so you can grab your tweezers.
Step 2: Using tweezers, dip the base in the glue. Wait a few seconds for the glue to get a bit tacky, but, warns Tharp, Don’t blow on it—you don’t want the germs from your mouth to get anywhere near your eye.
Step 3: Place a lash cluster on the outer edge of your eye.
Step 4: Follow up by placing lash bundles in the middle and inner corners. Then decide if you need more lashes in between the sets you’ve placed. Clusters are great that way—you can add as many or as few as you like!
For Strip eyelashes
Roll the band down to loosen the glue—Tharp says if you pull it straight off, you risk damaging the eyelashes. Wrap the strand around your finger to soften the spine. This is optional, but if the spine is really stiff, run it through your fingernails like a ribbon to give it a bend.
Measure the strand against your eye. If there’s any overhang, take note of how many lashes too long the strand is. Cut the band from the inside—not the outside! That way, you don’t lose any volume. Apply glue with a cotton swab. Wait a few seconds to let the glue get tacky on the lash. And remember no blowing![Source]
Using tweezers, place the middle of the strip in the center of your eye. Nudge the outer and inner corners down along your lash line. If at the end of it all, after some practice, you’re still having trouble getting a full strip on, this brilliant lash strip hack also works wonders.
Priming the lashes
You can get different varieties of individual lashes here. You can also consider individual lashes kits set that comes with a pair of tweezers and eyelash glue. Kits can help package all the needed materials together.
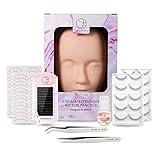
- -〖Why Choose Baisidai Lash Tech Kit〗:This Full Lash Kit for Eyelash Extensions is perfect for experienced lash tech, starters and cosmetology students. It has most of tools for eyelash extensions. 2.The lash extension kit comes with classic and volume lashes.You can use this kit to practice classic and volume eyelash extensions application.
- - 〖HIGH QUALITY〗: the lash extension kit comes with mink and silk lashes. Both Professional and Beginners can use this kit to do eyelash extensions application ;Glue is LATEX-FREE adhesive, for both volume and classic eyelash extensions. Lasting-5-6 weeks and drying time-3-5 sec. Eye pads are lint free gel patch, soft and smooth, no irritation to skin
- -〖3D Eyelash Extension Glue Reinforcement〗:This lash glue reinforcement which could nourish and repair your own eyelash after application of eyelash extension ;Extend the lasting time of grafting eyelash,make your beautiful eyelash long and lasting.
- -〖Professional Lashes Debonder〗:With this lash glue remove water,you could unloading glue quickly,microstimulation,what's more,the lash glue debonder does not hurt your real eyelash
- -〖A Great Gift〗:The lash extension kits comes with a fashion bag which would be great gift for your daughter,girl friends,mother, cosmetology students, massagist and woman to practice Makeup or Eyelashes Extension, Massage.We offer 1 year warranty, so you can buy it without worries. lease contact us at the first time if you have any questions. We will reply you within 24 hours. Thanks!
* As an Amazon Associate I earn from qualifying purchases.
Clean your eyelids
Before applying the individual lashes, use makeup remover to take off any lingering makeup on your eyes. There is some debate on whether to apply makeup before or after applying lashes, but more often than not, you want to work on a clean surface and allow the lashes to have a sticking surface free of dirt, oil, and makeup.
Pour out the lash glue.
On a small square of aluminum foil, pour out a small droplet of lash glue. You don’t need a lot of glue to apply the lashes, but a small drop of glue will make it easier to coat the lashes’ bottom portion.
Test where you want to place the lashes
Before applying your glued lashes, pluck a lash (or grouping of lashes) from the packaging with your tweezers, and hold the lashes in the spot you want to apply them. This will help you decide where to place the lashes before adding the glue, so they look the most flattering and natural.
Applying the eyelashes
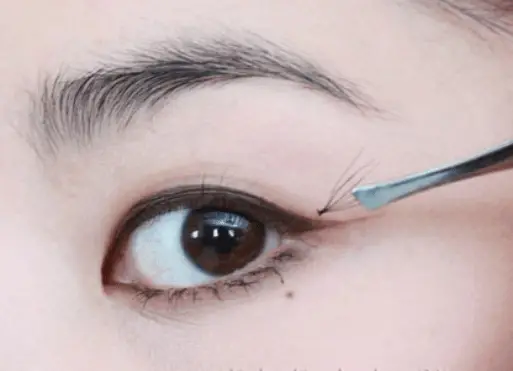
Individual lashes can come in a single or a small grouping of 2-5 lashes. However, your chosen lashes are packaged; use tweezers to grip near the base of the lash or lashes, and gently pluck it free from the packaging. The lashes’ base should be facing you, while the ends of the lashes should be facing away. Carefully dip only the base of the lashes in the small droplet of glue on the aluminum foil.
Glue the lashes to your eyelid
With the help of a mirror, bring the tweezers up to your slightly opened eye, and stick the lashes right above the roots of your real eyelashes, starting in the middle of your top eyelid. Once the lash is on your lid, you can use the tweezers to gently “brush” the lash upward so it mimics the curve of your real lashes and doesn’t droop down into your line of sight.
Continue to apply lashes to both eyes.
It is normally easiest to apply lashes to one eye and then the other. Depending on how thick you want your eyelashes to look, you can apply just a few lashes or most of the lashes that came with the package. Apply the lashes starting from the middle of your eye, and work your way outward to the corner of your eye. As you move outward, use longer lashes. Then, fill in the inner corner of your eye with the shorter lashes in the package.
Touch up the lashes
After about 10-15 minutes, the lash glue should be completely dry. Use your finger to softly touch the top of your lashes and check for stickiness. Once thoroughly dried, consider using an eyelash curler to gently curl and blend the false eyelashes with your natural eyelashes.
Apply makeup
Add the rest of your makeup when the individual lashes are completely dry. Apply any eye shadow and eyeliner you were planning to add to your eyes. The liquid liner looks best with false eyelashes because it is very effective in hiding glue bumps. Finally, apply mascara to both eyes to blend in the lashes even more.
How to Put on Fake Eyelashes without Glue?
False lashes add drama to your eyes, fatten-up thin fringe, and make your eyes extra flirty. If you are allergic to eyelash glue but still want to wear fake falsies, self-adhesive lashes are one goof-proof method to add volume to your eyes. To accessorize your eyes best, put on fake eyelashes after applying your foundation, concealer, and eye makeup.
You have to curl lashes with an eyelash curler. Lift your chin while looking straight into a mirror. Squeeze the curler gently at the base of the lashes and hold for two to five seconds. Move and press the curler gently up toward the edge of the lashes to create a slight bend in your natural eyelashes.
After that, measure the strip of lashes against your upper lash line. If your lash strip is too long, cut the end of the lash with a pair of small scissors to create the perfect fit. Pull the small plastic strip off the back of the self-adhesive lashes. Gently bend the lash into a U-shape to prep the lashes for your natural hairs. Bending the lashes ensures that they mold to the natural lashes without lifting at the corners.
Using tweezers, place the lash along your lash line. Closing one eye, gently pull your skin taut near the outer corner of the eye. Using the tips of your fingers, gently press the lashes down onto your natural hairs. Repeat until you’ve covered both lashes with the self-adhesive fringe.
Let the adhesive cling to your natural lashes for 60 seconds or more. Gently tug on the corner of your lashes to make sure the fringe stays put. To create a natural-looking lash line, cover both the real and fake fringe with one long swipe of dark brown or black liquid eyeliner. Apply two coats of mascara to help the lashes blend in with your real fringe.[Source]
How to Apply False Eyelashes for the first time?
Indeed, the application of these particular lashes proved pretty easy. Because the lashes are so light, you don’t need to cut them or worry too much about where they will fall on the lid. Thankfully, the margin for error is generous, if you certainly needed it. Since these lashes are truly the first set ever applied, you have to be careful when carrying out this.
When trying to apply false eyelashes for the first time, you may like to consider RIISCA Eyelash Extension Kit, which is for beginners to start learning eyelash extensions or perfect their lash extension techniques.
- EVERYTHING YOU NEED - Diy eyelash extension kit include all necessary lash extension supplies for beginners such as eyelash mannequin head, training lashes, five-point practice isolation paper, lash tweezers, eyelash extension glue and individual lashes. Get you start practice quickly and affordably.
- MANNEQUIN HEAD - Lash mannequin head is made of premium silicone; smooth, realistic surface texture and simulative of human skin giving you the closest possible experience to a real human. The hole of the mannequin head on the back can be easily fix on the mannequin holder or clamp, can also be used with any holder for upright use.
- PRACTICE EXERCISE SET - For the kit comes with 0.15 C Curl 8-15mm Mixed eyelash extensions; Eyelash extension glue with 3 sec drying time; High-grade stainless steel tweezers.
- STARTING A CAREER IN Eyelash Extensions - The lash extension training kit is the best choice for beginners to start learning eyelash extensions or perfect her lash extension techniques. Soft and self-adhesive training lashes, lash mapping stickers, help you learn lash extensions quickly and easily.
- CUSTOMER CARE PROMISE - Helping you is our mission. If for any reason you are not absolutely happy with your product we will refund your order, no questions asked. CONTACT US directly and we will take care of you. We love to help!
* As an Amazon Associate I earn from qualifying purchases.
How to apply Eyelashes Step by Step?
Artificial eyelashes range from individual clusters to the more traditional strips. You can use the individual ones to add subtle volume and a little length or try the traditional variety for a natural or full-on look, depending on the style you go for.
For those who are new to false eyelashes, it is important to buy a few sets to play with to get used to applying them. This helps to have a backup set, too, if one gets ruined in your attempts to master the application technique.[Source]
How to apply?
Step One – Brush through your lashes.
Please make sure the lashes are clean and brush through them before you start.
Step Two – Get your lashes.
Remove the false lashes from their packaging and put them next to your eyes to check that they are the correct length. They are too long if the band is poking the inner corner of your eye or if it extends past your outer lashes. If you need to trim the eyelashes, use eyelash scissors and trim from the lashes’ outer edge.
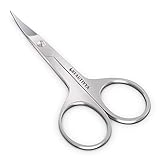
- Premium Design Cuticle Scissors: BEAUTIVYA Eyebrow Scissors is made using traditional craftsmanship. This Nail Scissors meets the highest quality standards to serve last. Our Small Scissors durable blades with sharp and curved tip offer precision trimming.
- Professional Manicure Scissors: BEAUTIVYA Nail Scissors is used to cut hand nails. This Eyelash Scissors is used for shaping false eyelashes and our Nose Hair Scissors is also used to pull the extra grown nose hairs.
- Ergonomically Designed Curved Scissors: BEAUTIVYA Mustache Scissors is used to trim your mustache to the level of perfection. Our Beard Scissors is also used by men for shaping their beard to provide them an attractive look. This Mini Scissors is very light weight and easy to carry in the bag.
- Safe to Cut Kids Nails: Moms best choice for baby nail scissor because it gives more control to mothers over how to cut the fingernails and seems to be more prevalent for cutting their newbie nails.
- Hassle Free Nail Care: Adult have different problems; ingrown toenails, thick, odd shaped, thin nails, small or large nails. This fingernail scissor is perfect solution to all. It can cut as deep as you want into the nail and can cut straight across the nail to help prevent ingrown toenails. They can also cut in a curved manner. It’s all based on how you steer the scissor.
* As an Amazon Associate I earn from qualifying purchases.
Step Three – Apply eyelash glue.
If you are right-handed, put a small blob of glue on the top of your left hand (do the opposite if you are left-handed). Let it sit for just a few minutes until it is a little tacky. Once the glue is tacky, take your false lashes and run the band through the glue, be sure to get enough glue on the strip and both edges.
Step Four – Apply the eyelashes.
Some people find it really easy to apply eyelashes with fingers, but it is much easier to use an eyelash application or a pair of tweezers, like Browticians, to get them right on the lash line. After this, check yourself in the mirror to ensure that the lashes are in a good position as you wanted.
Artificial Eyelashes Side Effects
Ladies in the whole world strive for fuller, thicker, and longer lashes. The quest to draw more attention to the eyes by using glued on false eyelashes has some serious side effects women should be aware of. Some of these side effects are discussed as follows:
Allergic Reactions
Consumer Reports.Org recently reported that both the glue and the solvents used to remove them could cause allergic reactions, leading to infections. Eyelash extensions also use glue by placing a single synthetic fiber on the eyelid one-by-one. Most glue that is used has a formaldehyde-base, and may also have rubber latex in the ingredients. Allergies can easily occur when you make contact with these products.
Loss of Natural Eyelashes
You might not be doing yourself any good every time you remove the false eyelashes; natural eyelash hair loss can occur, thus decreasing the number of natural eyelashes you have available and thinning them out. Access traction anywhere near your natural eyelashes can damage the eyelash hair follicles and stop your natural eyelashes from growing back.
Infections
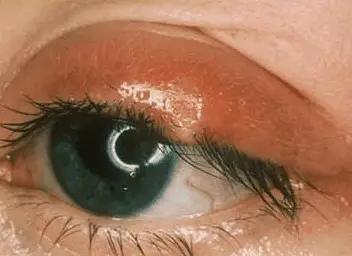
False eyelashes can trap dirt and dust, causing your eyes to be more susceptible to irritation and bacterial infection. The American Academy of Ophthalmology (AAO) warns that the potential dangers of cosmetic eyelash extensions and the adhesives used to apply them are infections of the cornea and eyelid, permanent or temporary loss of eyelashes, and eyelid swelling.
While all these side effects are something to think about, if you still decide you want longer, thicker eyelashes, rely on alternative methods that help promote the growth of your own natural lashes, such as LATISSE as an option. Various mascara products give the effect of longer, fuller lashes, and they are quite safe.
How To Remove Eyelash Extensions at Home with Vaseline or Coconut Oil?
Recent Posts
If you’re looking for the simplest, cheapest and best way to get that cleansed and nourished skin in no time, you definitely have to consider some of the best facial steamers for home. With the...
What is the best skin lightening cream for dark skin marks, African Americans? Get more insights on the most effective skin whitening cream and lotions for dark skin marks, pigmentation and acne...